For the past whole week, I have been thinking of nothing but baking something with my matcha or green tea powder. The choices are either a green tea with red beans loaf, or a green tea with red beans muffins...on certain days the thought of making a green tea Swiss roll seems just right. It was only this morning that I finally get down to make a green tea chiffon cake.
I didn't manage to get a 'proper' green tea chiffon cake recipe anywhere...neither from books nor the internet. Somehow, most of the recipes I could locate where not really meant for my small 16cm (6") chiffon pan. In the end, I had to fall back on the same recipe that I used to make my first chiffon cake.
 As I was 'home alone' for a couple of hours this afternoon, I had some fun playing around with the chiffon cake after it was cooled off. I took numerous shots of the cake from all sort of angles...
 this is one of my favourites among the lot. It is not a fantastic picture, but somehow I just like the way the image turned out.
 Thanks to my very thin bladed knife, I was able to unmold the cake without too much damage done on the sides.
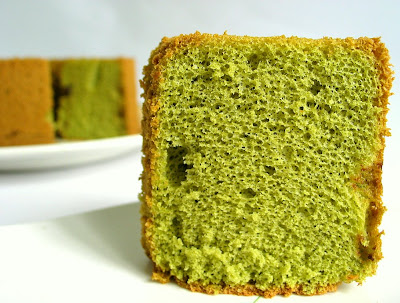
 This closed-up reminds me of nothing...but, pork floss (^p^)
 Just like my previous attempts, there were many holes and tunnels in the final product :( Not sure what went wrong, but it would likely be due to the folding of the egg whites to the yolk batter??
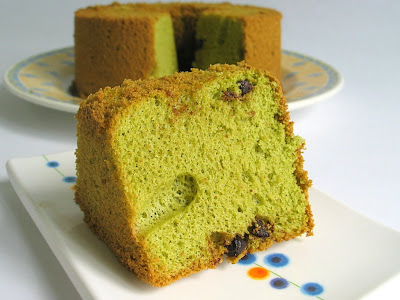 Instead of the usual green tea and red beans combo, I replaced the red beans with some dark chocolate chips.
 Even though I used a tablespoon of green tea powder, the taste of green tea was not as prominent as I would expect. Nonetheless, I find the green tea and chocolate chips combination rather 'delightful'...a very interesting blend of flavours.
Matcha Chiffon Cake with Chocolate Chips
Ingredients(make one 16cm cake)
1 tablespoon green tea powder
30ml milk
2 egg yolks
20g caster sugar
20ml vegetable oil
40g self-raising flour
2 egg whites
1/4 teaspoon cream of tartar
50g caster sugar
some dark chocolate chips
Method:
I didn't manage to get a 'proper' green tea chiffon cake recipe anywhere...neither from books nor the internet. Somehow, most of the recipes I could locate where not really meant for my small 16cm (6") chiffon pan. In the end, I had to fall back on the same recipe that I used to make my first chiffon cake.
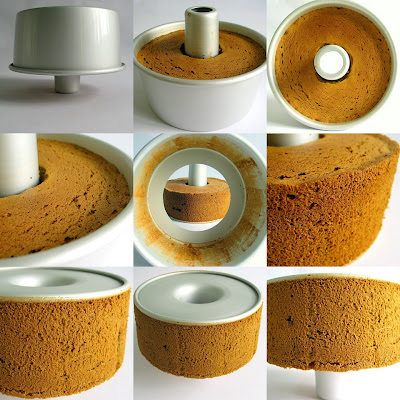
 As I was 'home alone' for a couple of hours this afternoon, I had some fun playing around with the chiffon cake after it was cooled off. I took numerous shots of the cake from all sort of angles...
 this is one of my favourites among the lot. It is not a fantastic picture, but somehow I just like the way the image turned out.
 Thanks to my very thin bladed knife, I was able to unmold the cake without too much damage done on the sides.
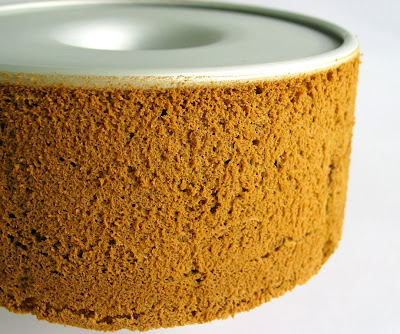
 This closed-up reminds me of nothing...but, pork floss (^p^)
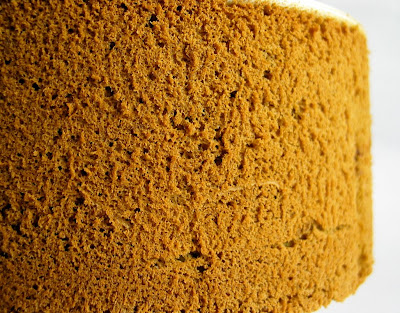
 Just like my previous attempts, there were many holes and tunnels in the final product :( Not sure what went wrong, but it would likely be due to the folding of the egg whites to the yolk batter??
 Instead of the usual green tea and red beans combo, I replaced the red beans with some dark chocolate chips.
 Even though I used a tablespoon of green tea powder, the taste of green tea was not as prominent as I would expect. Nonetheless, I find the green tea and chocolate chips combination rather 'delightful'...a very interesting blend of flavours.
Matcha Chiffon Cake with Chocolate Chips
Ingredients(make one 16cm cake)
1 tablespoon green tea powder
30ml milk
2 egg yolks
20g caster sugar
20ml vegetable oil
40g self-raising flour
2 egg whites
1/4 teaspoon cream of tartar
50g caster sugar
some dark chocolate chips
Method:
- Sieve flour and green tea powder together, set aside.
- Separate egg yolks/whites and bring to room temperature.
- Whisk egg yolks and sugar in a mixing bowl until sugar just dissolved. Add in milk and oil. Whisk till combined. Sieve over the flour and green tea powder mixture and fold gently with a spatula until flour mixture is fully incorporated into the batter.
- In a clean, dry mixing bowl, whisk egg whites and cream of tartar with an electric mixer until mixture becomes frothy and foamy. Add in the sugar in 3 separate additions while beating at high speed till just before stiff peaks form*(after note: after several attempts at baking chiffon cakes, I learned that the whites should be beaten until just before stiff peaks form).
- Add the egg white foam into the egg yolk batter in 3 separate additions, each time folding gently with a spatula until just blended.
- Pour 1/3 of the batter into a 16cm (6 inch) tube pan (do not grease the pan). Sprinkle chocolate chips over the batter. Pour the remaining half of the batter. Sprinkle with chocolate chips. Pour the rest of the batter into the pan. Spread the batter evenly.
- Bake in pre-heated oven at 170 degC for 25 ~ 30mins or until the cake surface turns golden brown, and a skewer inserted into the centre comes out clean.
- Remove from the oven and invert the pan immediately. Let cool completely before unmould.