Tuesday 30 October 2007

Strawberry Crumble Cake

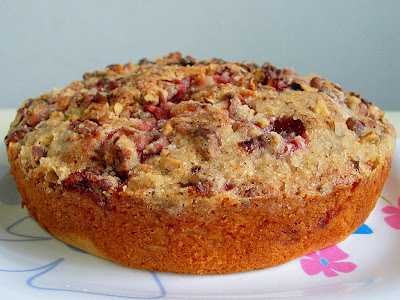
I bought a punnet of strawberries yesterday, as usual, they were too sour to eat on it's own. I looked through some recipes and decided to use them to make a crumble cake. I have been wanting to try this blueberry crumble cake recipe which I came across from a book, Cooking Desserts. I was really captivated by the beautiful photo of the cake and I've meant to try it once I get hold of some blueberries. Since I have yet to get any blueberries, I thought I should experiment it with strawberries instead. Hence, I got myself busy this afternoon and baked this Strawberry Crumble Cake.
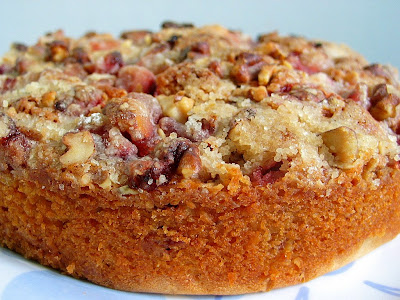

Although I have whole-wheat (or wholemeal) flour on hand, I replaced it with almond meal as I am starting to like the taste of ground almonds in cakes. The original recipe uses chopped pecans for the toppings, but I used some left over walnuts instead. I also cut down the sugar a little, as I thought a full cup of sugar would be too sweet. This cake requires some extra effort as you will need to spend some time to dice the strawberries, chop-up the walnuts (I break them into pieces), and zest the lemon. Once the initial preparations were done, the mixing of the batter was rather straight forward. All that was required was mixing the dry ingredients together, whisk the wet ingredients separately, then pour the wet ingredients into the dry ones and gave a few stir to combine. The toppings was also very easy, just combine everything together, sprinkle over the batter and finally drizzle some oil over and very soon it was ready for baking.
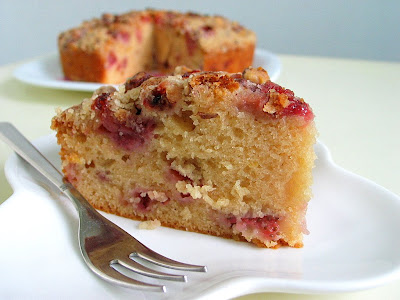


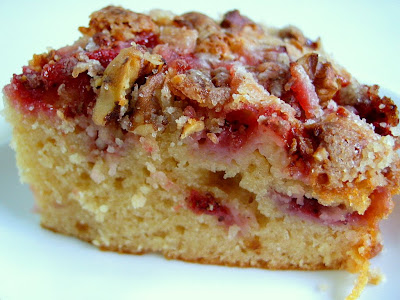
Since I wasn't sure whether the cake was thoroughly cooked through, I gave it another extra 5 to 10 mins in the oven. As a result, some of the walnuts were a little burnt although it didn't really affect the taste too much. The cake itself has got the texture which is almost similar to the strawberry yoghurt cake I did earlier. The difference lies on the toppings. It really gave the cake a very nice, sweet and nutty touch to it. The cake tasted delicious despite the tangy strawberries :)


Ingredients:

140g plain flour
70g almond meal
150g caster sugar
2 1/2 teaspoons baking powder
1 cup strawberries, diced
1 egg at room temperature
3/4 cup milk
1/3 cup oil
1 teaspoon vanilla extract
grated zest of 1 lemon

Topping:
1/2 cup chopped walnuts
60g light brown sugar
35g plain flour
1 cup strawberries, diced
2 tablespoons oil

Method:
  1. Pre-heat oven to 190 degC. Grease the sides and line bottom of a 20cm round pan with parchment paper.
  2. Sift flour, almond meal, sugar, baking powder into a large bowl. Toss the diced strawberries through the flour mixture.
  3. In a separate bowl, with a manual whisk, whisk together the egg, milk, oil, vanilla and lemon zest. Pour into the dry ingredients and stir with a spatula to combine.
  4. Pour the mixture into the prepared pan.
  5. To make the topping, combine the walnuts, brown sugar, flour and strawberries in a bowl, and sprinkle evenly over the cake. Drizzle the oil over the topping.
  6. Bake for 50~55 mins or until a skewer comes out clean when inserted into the cake.
  7. Let the cake cool in the pan for 20mins before unmolding. Serve the cake warm.

Recipe source: adapted from Cooking Desserts, Katy Holder

Wednesday 24 October 2007

I've been tagged

Baking Fiends United has tagged me with this Hi-5 or 5-thing meme:

5 things found in your room
5 things found in your bag
5 things found in your purse/wallet
5 things you’ve always wanted to do
5 thins you are currently into
5 people you want to tag

This is the first time I have been tagged to do a meme. Well, I guess no one on earth would really be interested to know what I have in my bag or wallet, furthermore I am really not a bag person, I am 'hands free' most of the time. I rather tweak the meme a little just so to make it suit the theme of my blog...I hope I won't get hantam for making the changes ;)

ok, here's my version of the 5-things meme:

5 things found in my kitchen:
  • a dinning table
  • a display cupboard filled with bottled and canned Coca Cola (collected over the years)
  • a fridge, studded with fridge magnets
  • a useless cooker hood
  • a fan (I need to turn it on during very hot weather so that my kids will not get drenched all over in their own sweat.)

5 unusual things found in my fridge:
  • vitagen drinking straws
  • an assortment of candies (given generously to my younger boy's friends in pre-school)
  • a bottle of ling yang (antelope horn, a kind of Chinese medicine)
  • a packet of quick barley (pearl barley that has been steamed and dried)
  • empty styrofoam trays

5 things found in my 'baking equipment' cupboard:
  • a 20yr old handheld mixer
  • three 20 yr old aluminum baking trays
  • a diet scale for measuring baking ingredients
  • one brand new Daiso-bought 18cm tart pan
  • disposable pans of various shapes and sizes

5 things I’ve always wanted to do
  • to work in McDonald's (this has been on the list since I was a teen) so that I can learn how to make scramble eggs and those breakfast biscuits (I have recently found an online recipe, so I will probably drop this from the list soon!)
  • to start my own business or to be my own boss (this has been on my list since the very first day I started working in the corporate world.)
  • to work in Starbucks so that I can make a perfect cup of latte.
  • to re-visit all the places me and my husband have been to, this time round with my kids.
  • to pick up jogging, so that I can join my husband on his weekend jogging session.

5 things I am currently into
  • enjoying every single moments of my life
  • baking, baking and more baking
  • trying very hard to improve my cooking skills!!!
  • blogging and taking food photos
  • planning a series of outdoor and indoor activities for the kids during the coming school holidays.
5 people I want to tag
  • will not tag anyone, as I didn't following the exact meme closely ;p

Friday 19 October 2007

Banana Chiffon Cake


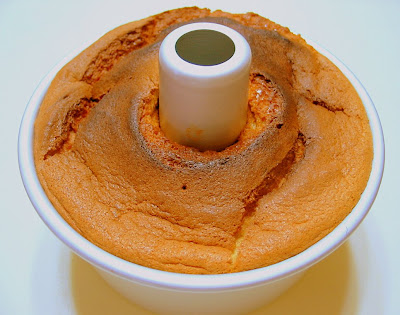
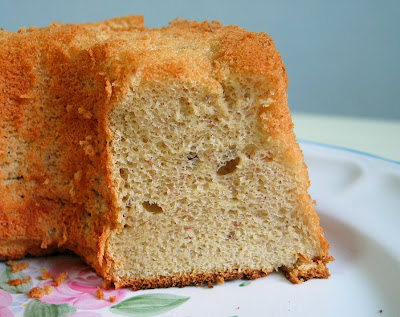
I wanted to make a banana chiffon cake as I had a few very ripened bananas hanging in my kitchen. However, after looking through the recipe I have on hand, it is meant for a bigger pan size. I was about to give up the idea, when I happened to visit Lousy Baker's blog. She has baked the same banana chiffon cake that I had in mind, and, she managed to reduce the quantity to fit a 16cm pan. How nice! After seeing her beautiful cake, I set off to make this cake right away!


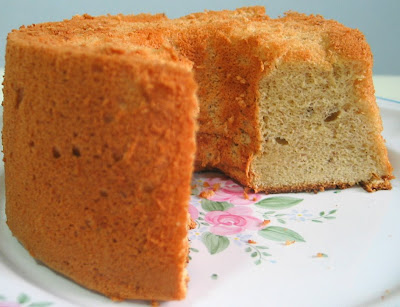
I used 3 eggs instead of 2 eggs as I halved the portion exactly. I believe 2 eggs is just nice for a 16cm pan. As a result, the batter almost filled up the entire pan. Fearing that the batter may spill over while baking, I lined the base of the oven with a foil, just before baking! Luckily, the batter was quite 'obedient'...it stayed on in the pan, and the cake climbed over the brim! I was so happy to see the cake "blooming" away! However, this also meant that the top got burnt a little, as it almost hit the roof of the oven where the heating elements are located :(

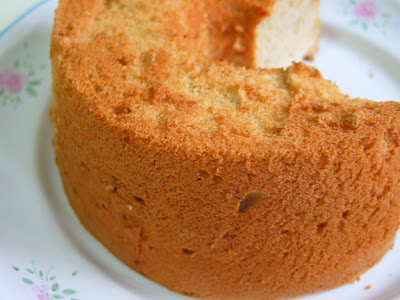
I didn't manage to do a good job while unmoulding the cake. A few sides almost got torn and peeled off.

I made this cake with the help of my little assistant. He was responsible for the mashing of the bananas...the mashed bananas was quite lumpy and I was a little worried whether it would affect the texture of the cake. I got him to whisk the yolk batter while I gather the items ready to whisk the egg whites. I must say he did quite a pretty good job.

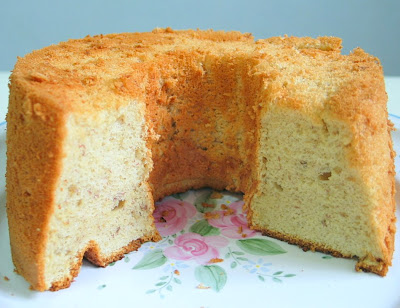
This banana version has got more flavour than the milo version I made earlier. The lumpy mashed bananas didn't effect the texture at all. When I offered the cake for my little one to try, he told me he didn't like it! "It's not a pandan cake! It's a banana cake! I don't like!". Well, I wasn't upset at all, as he's only used to pandan cake...and I guess, all along, he was thinking that he was helping me to make a pandan cake! lolz!!!

Well, it seems to me that making a chiffon cake is really not as difficult as what I used to think. In fact, next time, I will get the boy to handle the yolk batter on his own, while I whisk the egg whites...this will definitely cut down on the preparation time. Hmmm, I already have in mind to try the orange version soon.


Ingredients
(make one 16 ~ 18 cm cake)

3 egg yolks
25g caster sugar
1/8 teaspoon salt
30ml cooking oil (I used olive oil)
85g banana puree (about 2 medium size bananas)
1/4 teaspoon banana essence (I used vanilla extract)
55g plain flour
1/8 teaspoon baking soda

3 egg whites
1/4 teaspoon cream of tartar
50g caster sugar

Method:
  1. Preheat oven to 170 degC. Sieve together flour and baking soda, set aside. Mash banana, set aside.
  2. Separate egg yolks/whites and bring to room temperature.
  3. Whisk egg yolks and sugar in a mixing bowl until sugar just dissolved. Add in salt, oil, essence and mashed banana. Whisk till combined. Sieve over the flour mixture and fold gently with a spatula until flour is fully incorporated into the batter.
  4. In a clean, dry mixing bowl, whisk egg whites and cream of tartar with an electric mixer until mixture becomes frothy and foamy. Add in the sugar in 3 separate additions while beating at high speed till just before stiff peaks form* (after note: after several attempts at baking chiffon cakes, I learned that the whites should be beaten until just before stiff peaks form).
  5. Add the egg white foam into the egg yolk batter in 3 separate additions, each time folding gently with a spatula until just blended.
  6. Pour batter into a 16cm or 18cm (6 inch or 7 inch) tube pan (do not grease the pan). Spread and smooth the batter evenly with a spatula. Bang the pan gently on a work surface several times to release the air bubbles trapped in the batter.
  7. Bake for 25 ~ 30mins or until the cake surface turns golden brown, and a skewer inserted into the centre comes out clean.
  8. Remove from the oven and invert the pan immediately. Let cool completely before unmould.
Recipe source: adapted from Chiffon Cake is Done by Kevin Chai

Wednesday 17 October 2007

Let the machine do it!

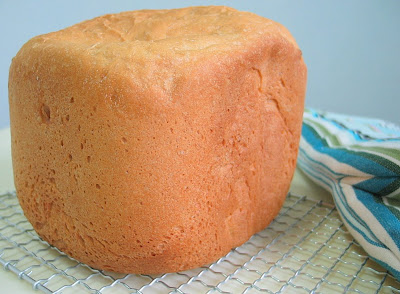
My bread machine came out with this loaf yesterday :)

It did most of the job, while my elder boy and I only took care of the measuring and adding in the ingredients in the right sequence. After 3 hours, out came this beautiful loaf!

It's a Crunchy Peanut Butter Bread recipe which I have taken from this book, The Complete Bread Machine Cookbook by Sonia Allison. The ingredients are very basic, just water, oil (I used olive oil), bread flour, salt, sugar, some milk power, yeast and the only additional flavouring is three tablespoons of crunchy peanut butter. There's no eggs or butter involved.


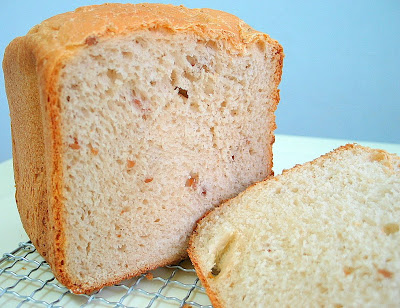
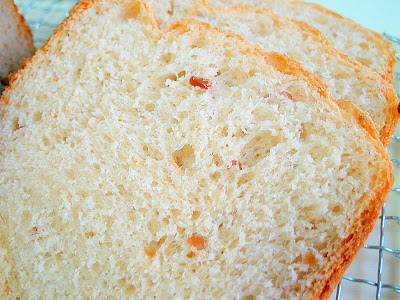
I wasn't expecting anything fantastic from this loaf...as I have tried enough bread recipes to have came to the conclusion that the texture of the bread made from the bread machine, somehow will not be as soft, compared to those made by hand. Indeed, I was very surprised how soft, light and airy this bread turned out to be! You can gauge the texture, just by looking at the number of holes on the bread. I should have suspected it, as the bread rose all most to the brim of my bread machine when it was baking away. It tasted very much like a plain loaf, not sweet at all, as the amount of sugar is really minimal. However, I could taste the bits of peanuts and there was even a hint of the peanut butter. It remained soft and fluffy the next morning, and after lightly toasted, it tasted very delicious when spreaded with peanut butter.

I must say, this bread fits in very well to the description given in the book:
"What can one say about a high-rise loaf flavoured with peanut butter? It's a stunner, predictably succulent when it's buttered and spread with Marmite. Or use it as a base for cheese on toast. All sound stuff with child appeal."

This is one recipe that I can really leave it to the machine to do the job!


Ingredients:

300ml(1 & 3/8 cups) water
3 tablespoons crunchy peanut butter
1 tablespoon oil
450g (3 cups) bread flour
1 & 1/2 teaspoons salt
2 teaspoons caster sugar
2 tablespoon dried skimmed milk powder
1 & 1/4 teaspoons instant or fast-acting dried yeast


Method:

  1. Pour the water into the breadmaker bucket. Add in the peanut butter, oil and half the flour.
  2. Sprinkle with the salt, sugar and dried milk powder. Cover with the remaining flour.
  3. With a finger, make a small indent in the centre of the flour, and place the yeast in the indent.
  4. Fit the bucket into the breadmaker, and set to Basic white or No. 1. Select the desired colour of the crust. (The recipe did not state the loaf size, I set it as 2 lb, and selected light for the crust).
  5. When the cycle completes, carefully shake the loaf out of the bucket and let it stand the right way up. If desired, brush with glaze (I usually omit this). Leave the loaf to cool for at least an hour before cutting and remove the blade/paddle if necessary.

Tuesday 16 October 2007

Fun with Toast

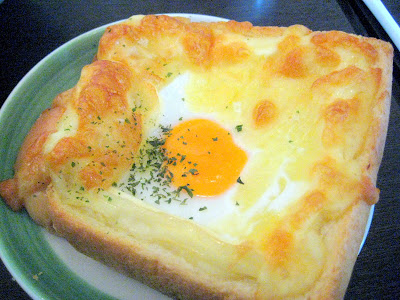
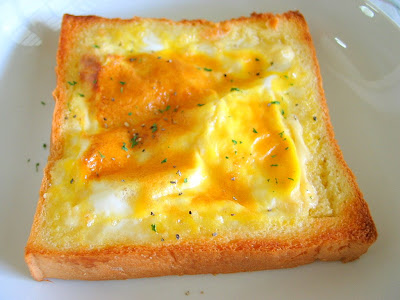
During our recent trip to Tokyo in June, we had breakfast at one of the western cafe chains, Pronto. The cafe was just one block away from the hotel we stayed. My nephew ordered one such egg toast:


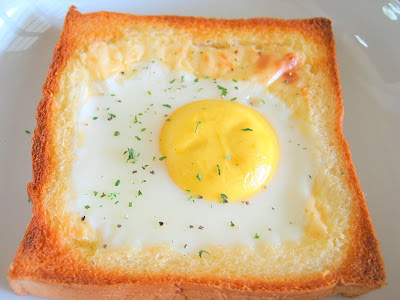
I didn't have a chance to try it, as we were all busy with the individual sets that we ordered for ourselves. After returning from the trip, I have been wanting to try to replicate this...however, I wasn't sure how the egg could set nicely on the bread toast. It remained a mystery to me until I came across a cookbook on the various ways to eat a bread toast. Although there is no specific recipe in that cookbook that teaches you how to make this egg toast, somehow, I got the idea and came up with my own version below:


I am not sure about the taste, but it did look quite close to the original version. If you are interested, here's how I went about it:

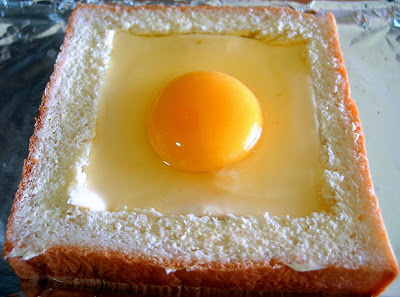
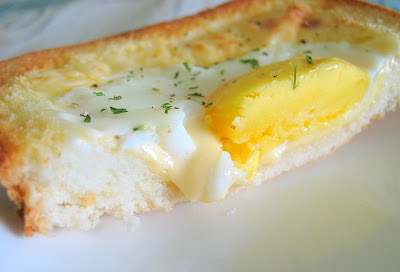
Place a thick toast (I used Breadtalk's thick loaf) on a baking tray, cut the four sides (but don't cut through) to get a square in the middle. With fingers or the back of a spoon, press and flatten the bread in the middle. Place a slice of cheese, press it down a little, and place an egg on it. Bake in a toaster or an oven, until the egg is set...depending on how cooked you like your egg to be. Sprinkle with some pepper and dried parsley's and serve. (To prevent the sides of the toast from getting browned faster than the egg, I spreaded some butter on the sides...it helps.)


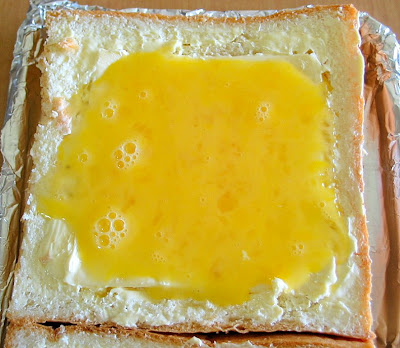
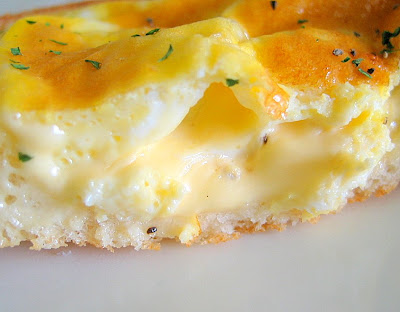
My younger boy doesn't really like sunny-side-up, so I lightly beaten an egg and poured it over. The beaten egg became watery, unlike the sunny-side up since egg white is thicker. As such, I had to be extra careful when transfering the baking tray to the toaster, making sure the egg didn't spill over the sides.


Here's how the scrambled egg version looked like.


Too bad, my boy didn't like this scramble egg version either...he finds it too eggy and cheesy.


As for me, I prefer the sunny-side-up version better :)

Saturday 13 October 2007

A Birthday Cake


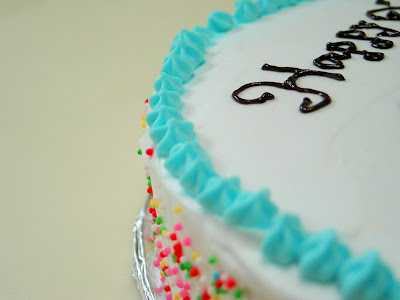
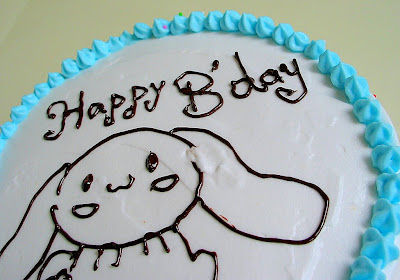
Baked a small birthday cake for my niece a few days ago. Apparently, I didn't do a good job at decorating it :(

I find it so difficult to make the cake surface smooth. Although I do not have a cake decorating stand, I could still manage to get the sides quite smooth and even (by placing the cake on a cooling rack and turn it, while holding the palette knife at the side). However, I have no luck for the top surface...no matter how hard I tried, there was still the impression of the palette knife all over :'(


My niece loves this Cinnamoroll, one of the many Sanrio characters. I tried piping some melted chocolate over a Cinnamoroll picture with the intention of using it as a chocolate transfer. Well it didn't work, even though I have chilled the chocolate to let it set, it refused to stick onto the cake surface. As I didn't have the patience and time to make another one, I piped the character free-hand! Quite a daring act, hehe! As a result, Cinnamoroll appeared to have over eaten, hence, the puffy looking chins, and his ears were totally off!

I guess the girl wouldn't mind, and proceed to pipe the words. It was only after piping the word 'happy', I realised that there wasn't enough space for the word 'birthday'! No choice, I got to settle with a short-form! I was only a little cheered up after I managed to pipe on the little blue stars...I would love to make those weaving patterns, but as of now, I can only do the stars. The stars really helped dress up the cake a little.


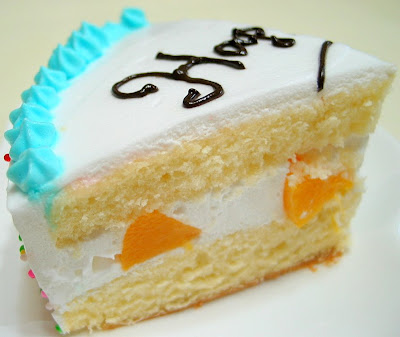
This time, I used another sponge cake recipe as I only wanted to make a 18cm cake. The sponge layer tasted good...soft and fluffy.


The only thing I could console myself was that the middle layer was filled quite nicely this time.


The cake certainly tasted good, judging by the fact that 1 adult and 3 kids could finish half the cake in a set!


Ingredients:
(make a 18cm round cake)

3 eggs, bring to room temperature
90g caster sugar
100g cake flour
20g unsalted butter, melted
2 tablespoons fresh milk (I used low-fat fresh milk)
2 ~ 3 drops of vanilla extract

filling & frosting:
1 cup non-dairy whipping cream
1 can peach slices

Method:
  1. Sift cake flour, set aside. Melt butter, set aside. Grease and line a 18cm round pan. Position rack at the lower bottom of the oven. Pre-heat oven to 170degC.

  2. With an electric mixer, whisk eggs and sugar on HIGH speed for about 5 to 7mins, until the batter double in volume and is ribbon-like (the batter should leave a ribbon-like texture when the beater is lifted up). Turn to LOW speed and whisk for another 1 to 2 mins. Whisking at low speed helps to stabilise the air bubbles in the batter.

  3. Sieve over the sifted cake flour in 3 separate additions, into the batter. With a spatula, gently fold in the flour each time the flour is added. Take care not to deflate the batter.

  4. With a spatula, mix about 1/3 of the batter with the melted butter in a separate bowl. Fold in this mixture into the remaining batter. This method will help to ensure the butter will be fully blended and at the same time will not deflate the batter.

  5. Add in fresh milk and vanilla extract, and fold in gently with spatula, until well blended.

  6. Pour the batter into the prepared pan. Gently give the pan a few bangs on a work surface to release air bubbles that are trapped in the batter. Bake for 30 ~ 35 mins, or until a skewer inserted in the centre comes out clean. Unmold, invert the cake on cooling rack and cool completely.
Assemble the cake
  1. With an electric mixer, whip the non-dairy whipping cream still stiff.

  2. Slice the cake horizontally into 2 layers. Brush the surface of the sponge layers with the syrup from the canned peach slices. This helps to keep the sponge layers moist.

  3. Place one layer of the sponge cake on a cake plate/board. With a palette knife, spread some whipped cream evenly over the layer. Arrange 2 concentric rings of peach slices on the sponge layer. Fill with some more whipped cream and spread it evenly all over. Top with the second cake layer.

  4. Spread the whipped cream over the top and side of the cake. Decorate as desired.
Recipe source: adapted from 点心达人, 轻松学 /小川智美著

Wednesday 10 October 2007

Assorted Sweet Buns


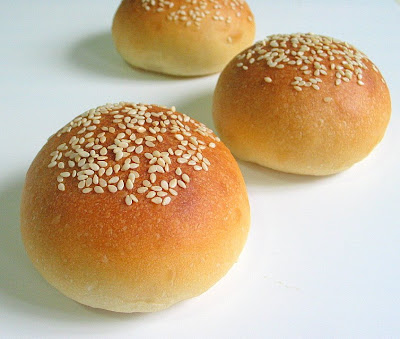
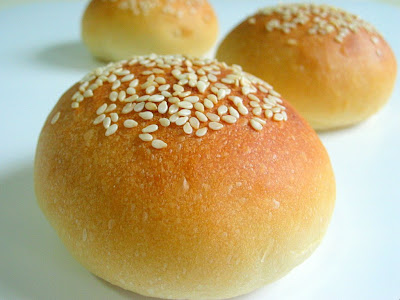
I made a batch of sweet buns using the same bread recipe as the milk loaf. According to the original source of this recipe, the bread tastes as good when made into small buns. I filled some of the buns with red bean paste and a few with kaya spread.


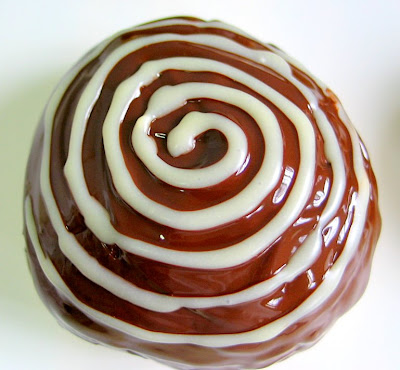
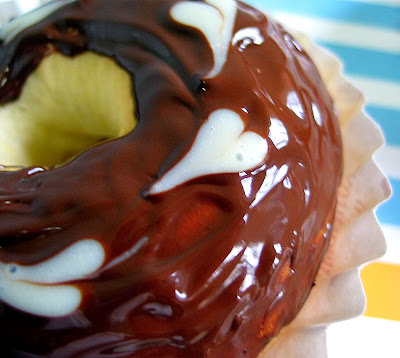
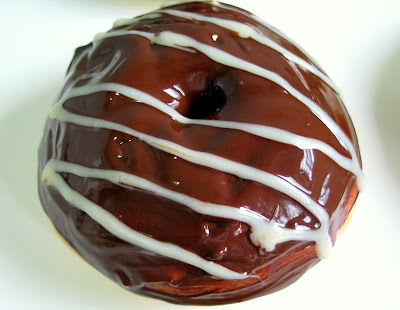
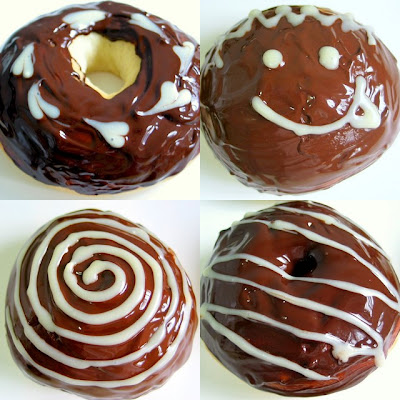
I made a few doughs into donut shapes and glazed them with melted chocolate. I don't do any deep frying at home, so, making any donuts is out of the question, even though my boys have also caught on the donut waves lately.


Actually the only thing they like about donuts are the sweet toppings...especially those that are glazed generously with chocolate. The chocolates that I used have got a very smooth texture, I didn't have to add any butter or whipping cream. The consistency was just right for glazing. As I didn't have any white chocolates on hand, I tried melting some white chocolate chips. To my surprise, it was rather difficult to melt the chips...and it was very hard and thick, as such I had to add a few teaspoons of milk in order to get the right consistency for decorating.


To create the effect of the heart shapes, after coating the buns with dark chocolate, simply add drops of white chocolates, equally spaced out, over the surface. With a toothpick, swap it across the white dots. I saw this in a cookbook long time ago, and only had the chance to try it today. Not very impressive, isn't it ;')


I didn't use a donut cutter or any cookie cutter to cut out the centre hole of the donut. What I did was quite 'primitive'! I simply shaped the dough into a round ball, and poke a finger right through the centre. Then I "spin" the dough around with a finger to enlarge the hole. It was only at this point that I realised that I had to use something to prevent the hole from closing up during the second proofing. I couldn't think of any tools to use on hand...and finally, I got out a couple of empty bottle caps and stuck it in the dough. I removed the caps just before baking, and it didn't seems to work. Once the buns were subject to the heat in the oven, they expanded and the hole almost disappeared!

The kids were happy when they saw these...


but I much prefer these plain ones!


Tuesday 9 October 2007

Baked Rice

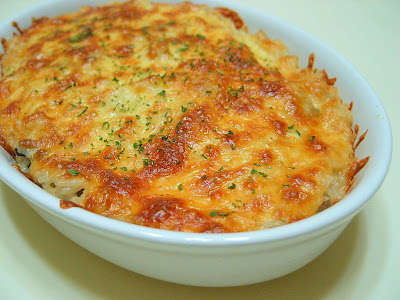
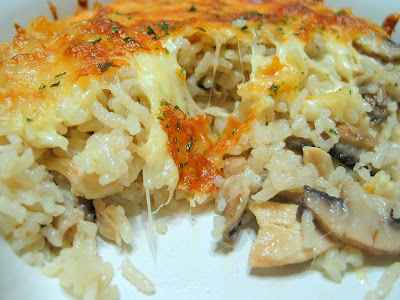
I was initially planning to cook my usual rice-cooker chicken rice for dinner last night. Upon several requests by the rest of the family members, in the end, I came up with this Chicken & Mushroom Baked Rice in creamy sauce.


I have tried making baked rice dishes several times. When it comes to cooking dishes, I have a tendency not to follow the recipes closely. Somehow, I do not have the habit of measuring the ingredients, I simply estimate the amount needed. As a result, sometimes the rice will be too dry, sometimes the combination just didn't seems to be right...most of the time it turned out to be too bland or not creamy enough.


This time round, I still didn't follow the recipe exactly, but at least, I took the effort to measure the amount of cream, and the amount of chicken stock required. This actually paid off. The rice was not dry at all and it was creamy enough, though I should have added more black pepper.

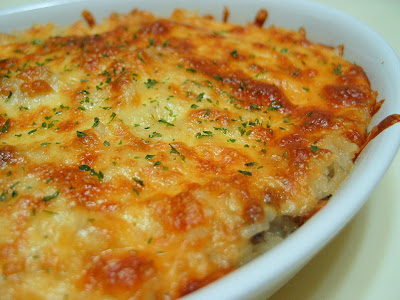
My kids love the golden cheesy crust and both saved it till the last to finish off. In fact, they had a bigger rice portion than what they usually take if it they were given plain rice. I reserved a portion for my better half, and when he called to say he would be home soon, I added the cheese toppings and popped the dish into the oven. When he returned, he was pleased to have a piping hot baked rice fresh from the oven...the only thing he complained was, his portion was too small ;)

Ingredients:
(serves 4)

1.5 cups uncooked rice
2 chicken thigh
100g fresh mushrooms of your choice , sliced thickly
some minced garlic
1 cup cream (dairy)
1/2 cup chicken stock
1 teaspoon salt (adjust according to taste)
some black pepper
some grated mozzarella cheese
dried parsley

Method:

  1. Wash and cook rice with rice cooker.

  2. Bring a pot of water to the boil, put in the chicken thigh and boil till the chicken is almost cooked. Let cool and shred the chicken into bite sizes. Reserve half cup of the chicken stock.

  3. Heat up a deep pan, with some cooking oil (or butter) stir fry minced garlic and mushrooms. Add in the shredded chicken meat. Add pepper and salt to taste. Continute to stir fry till the mushrooms become soft.

  4. Add in the cream, stir well. Add in the chicken stock and bring to a boil. (Note, always add cream BEFORE the chicken stock, otherwise the mixture may not be smooth.)

  5. Add in the cooked rice. Stir and let it cook for a few mins or until the sauce is almost fully absorbed by the rice.

  6. Place rice into a heatproof baking dish. Cover top with grated cheese.

  7. Bake in a pre-heated oven at 200 degC, till the cheese turns golden brown. Sprinkle with some dried parsley. Serve immediately.

Sunday 7 October 2007

Easy Plum Cake

I was in a dilemma whether to put up this post after having tasted this Plum Cake.

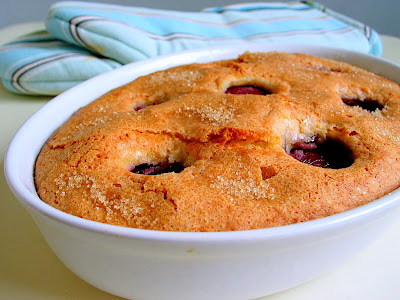
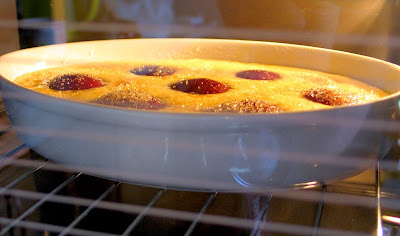
Initially I was so pleased with the look of this cake when it was taken out from the oven. I was so eager to share the recipe that I actually started typing it out while the cake was cooling off. I really like the nice golden crust rising above the sunken plums, and it looked lovely in this ovenproof dish.


Lately, I have been buying fresh plums whenever I passed by the fruit stalls. I am not a fan of plums, until I came across this variety...they are slightly oval in shape, and look very much like huge prunes. They are much sweeter than the usual plums and the skin is less tart. It was later on when I dropped by the supermart that I realised they are known as Sierra Prunes.

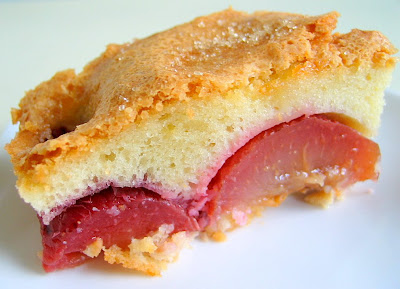
I have came across a few nice plum cake recipes posted by bloggers, but when I saw this apricot cake recipe from this book, Easy as Cake, I thought it is too simple a cake to give it a miss, although I was totally clueless how the cake will turn out, and I have never tasted a plum cake before. And I do believe it is a much healthier choice as only a small amount of oil is used with no butter added.


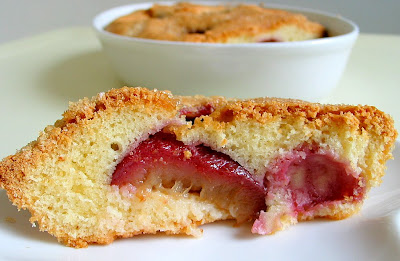
When freshly baked, the crust of the cake was a little hard and crisp, the texture was almost similar to biting into a piece of cookie. The cake was crumbly and a little on the dry side. Those parts near the fruits were moist though and it tasted alright. Nothing fantastic, just ok. However, I don't really know what to say about the plums...somehow, after baking, the fruits have lost their fresh taste :(


This photo was taken on the day that the cake was baked. I read that some plum cakes will be firm and crumbly when first baked, after leaving it overnight, the texture will become softer. True enough, when I had a slice the next morning, the crust was no longer crisp, and the cake was softer and moist.


Here's the photo of the cake that was left overnight on the table. Sad to say, all of us didn't like it at all...and the plums were a great disappointment, they became rather soggy and tasteless! Naturally, I was left with more than half of the cake. Luckily, I didn't make the full amount of the recipe...otherwise I would have a big problem! I kept the rest of the cake in the fridge and almost wanted to give up posting this recipe. It was only the following day, when I took out the cake to try to finish whatever I could, that I discovered that it actually tasted much better when chilled. In fact, the plums wasn't that soggy, and I even found the taste refreshing?! It was this twist that I decided I should still proceed with this post, at least just for record purpose!

Ingredients

3 large eggs, room temperature
1 cup granulated sugar
1 teaspoon vanilla extract
1/3 cup vegetable oil (I used olive oil)
1 ¼ cups plain flour
1 ¼ teaspoons baking powder
8 fresh plums, pitted and halved
2 tablespoons brown sugar

Method

  1. Preheat oven to 180 deg C, lightly grease and line a 11¾ x 9¼ x 1½ inch pan with parchment paper.
  2. In a mixing bowl, with a manual whisk, whisk eggs and sugar until sugar almost dissolved. Add in vanilla extract and oil, mix well.
  3. Sieve over flour and baking powder, whisk till the flour mixture is fully incorporated and the batter becomes smooth.
  4. Pour batter into the prepared pan and arrange the plums cut side down, on top of the batter.
  5. Sprinkle with brown sugar and bake for 45 mins, or until golden brown.

Recipe source: adapted from Easy as Cake by Ruth Jolles

Thursday 4 October 2007

Easy Lunch

I always find it very challenging to prepare lunch for the kids.

Since I am not good at cooking, I always have to rely on very simple and easy meals which I can handle. The entire "process" requires carefull planning as well...I'll have to make sure the lunches do not "repeat" itself too often, and I try not to overlap what we have for lunch with our dinner meals...you know, I'll make it a point not to have chicken for lunch and chicken again for dinner, and so on. On top of that, I still have to ensure the kids get to get their greens and maintain a balanced diet. The rest of the post will feature what I came up with for the past three days.

Set 1: Creamy Chicken & Mushroom Pasta


This is a rather easy meal to whip up, and one of the few dishes that my kids keep asking me to cook for them. Since I ran out of fresh cream, I used a can of mushroom soup for the sauce. To make up for the "illegal" use of canned soup in this dish, I added fresh chicken thigh meat (boiled and sliced into bite sizes) and fresh shitake mushrooms. These were stir-fried with some garlic and added to the pot of mushroom soup...with just a dash of peppers and no other seasoning, the sauce was poured over a plate of angel hair noodles. I liked the "woody" taste from these fresh mushrooms.

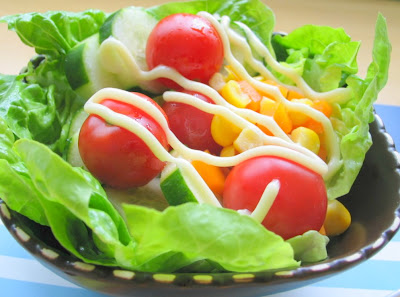
We had the pasta dish with some salads...the two of them were trying their best to finish their share of the raw lettuce, zucchini and cherry tomatoes...although the kids do eat cooked vegetables, they are still not comfortable chewing raw greens ;)


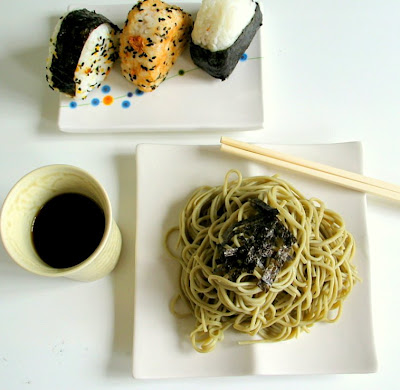
Set 2: Cha Soba with Onigiri (Rice ball)

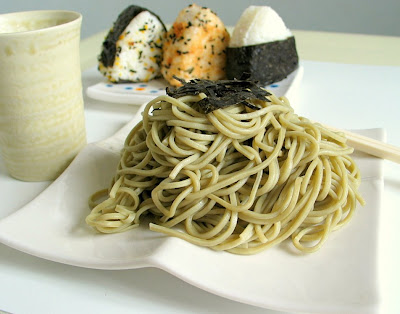
This is the first time I have made this Cha Soba (cold noodles) dish for my kids. I added a few Onigiri (rice balls) to complete the meal. This soba dish was really not authentic as I omitted the other condiments such as raw quail egg, spring onions and wasabi...knowing very well that the kids would push these aside.

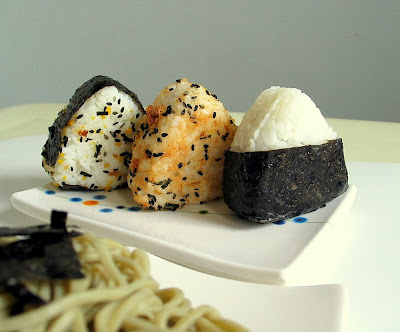
These assorted rice balls were filled with pork floss in the middle, and coated with black & white sesame seeds and some furikake seasonings.


My younger boy prefers the rice ball over the cold noodles...he ate 3 in a row!


Set 3: Hotdog

Our lunch today...hotdog with tortilla chips. This is another fast to cook, quick to eat meal :p


My boys helped put together the sandwich when they were back from school. I added some sour wriggle worm candies as a treat.


Here's my version...topped with some hot & spicy salsa sauce (my better half gave me this idea). If you like spicy food, this is the way to go!!

Now, what are we going to have for lunch next week?!!

Monday 1 October 2007

Rainbow Chocolate Cake


This is going to be the most colourful post I have ever posted!

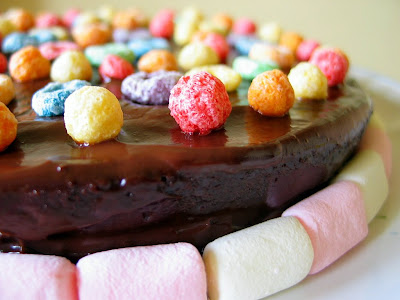
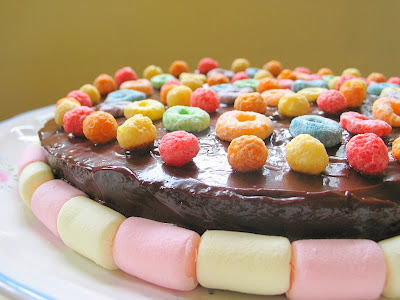
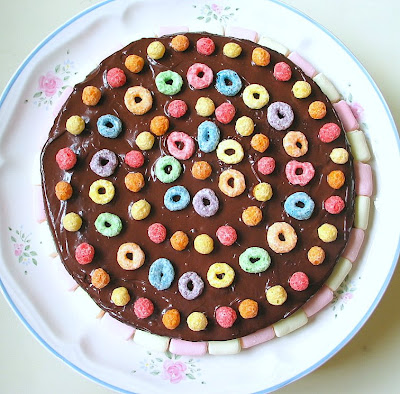
Today is Children's Day. It's a school holiday for children who are in the primary and pre-schools here. I made this cheerful rainbow chocolate cake for the kids this morning.


I used a straight forward chocolate cake recipe, "Devilishly Moist Chocolate Cake" from The Cake Book, by Tish Boyle. Well, I believe, any chocolate lovers will surely be attacted to a cake with such a name. The cake is made with oil, as such, it's suppose to remain soft and moist even when refrigerated or frozen. I decided on this recipe as I have all the ingredients on hand, and it seems to be one of the simpler cake to make.

I didn't use an electric mixer as stated in the instructions. I used a manual whisk and spatula instead. The only problem I faced was when mixing the wet ingredients to the flour mixture...it took me some arm power to get the mixture smooth. Fortunately, my little helper was around, waiting eagerly to take over while I rest my arm for a few seconds. The mixing became easier after my boy helped pour in the hot water gradually. The final batter was very thin and watery! I halved the recipe as a 9" cake is too big for us. Somehow, my mind was not working well, and I used a 8" instead of a 7" pan. As a result, the cake was rather flat and short in height.

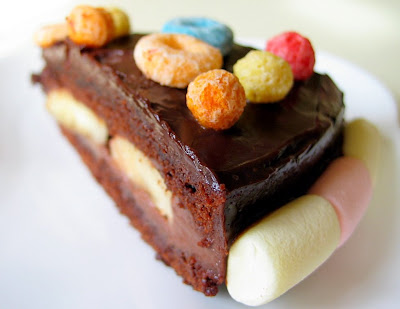
To make up for the height, I sliced the cake into two thin layers and filled it with chocolate frosting (melt over low heat, half cup of cream with 150g dark chocolates) and banana slices. I covered the entire cake with a thin layer of the remaining chocolate frosting.

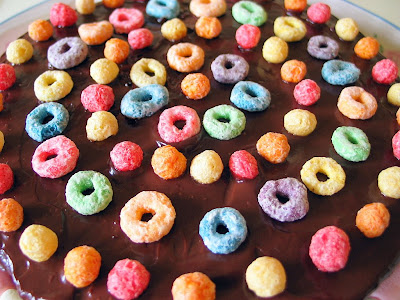
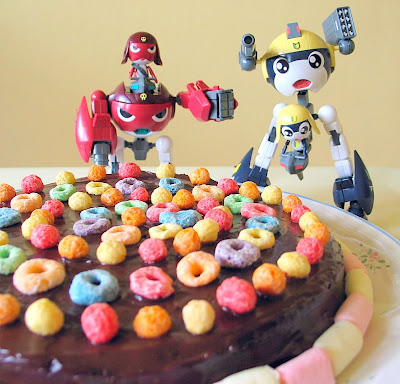
I decorated the top with colourful kids cereals...Trix and Frost Loops, and added a ring of marshmallows on the side. If not for my kids stronger preference for a chocolate frosting, these colourful bits will look better if I were to use whipping cream.

While I was busy with the cake, my elder boy spent the entire morning fixing the two toy robots (Keroro Gunso) I got for them. He managed to assemble all the various small parts without my help. I thought these two figurines really look cool!

Here's the inside of the cake...I still think the cake layer tasted much better when left in room temperature for about 5~10 mins after it has been taken out from the fridge. Other wise it tasted a little hard and dry. Other than the cereals which has lost their crispness, the cake was actually very tasty...extremely chocolaty...something which I didn't expect, as the cake didn't look anything close to it's name, without any frosting. I guess, you can never go wrong when you pair off chocolates with bananas and marshmallows :)


Here's the recipe for the Devilishly Moist Chocolate Cake.

Ingredients:
(makes one 9" cake)

1 1/2 cup (161g) all purpose flour
3/4 cup (61g) natural cocoa powder
1 1/4 teaspoon baking powder
1/2 teaspoon baking soda
1/4 teaspoon salt
1 2/3 cups (332g) granulated sugar
1/3 cup (80ml) safflower or other neutral vegetable oil (I used olive oil)
2 large eggs
1/3 cup (80ml) whole milk (I used low fat milk)
2 teaspoons vanilla extract
1 cup (240ml) boiling water

Method:

  1. Preheat oven to 325 degF. Grease bottom and sides of a 9 x 3 inches round cake pan. Dust the pan with flour and set aside. (I lined the bottom with parchment paper.)
  2. Sift together flour, cocoa powder, baking powder, baking soda and salt into the bowl of an electric mixer. Add in sugar and mix at low speed until blended. (I used a spatula to mix in the sugar). Add in the oil and mix a few seconds until the dry ingredients are crumbly. (I used a spatula to mix in the oil).
  3. In a small bowl, whisk together the eggs until blended. Whisk in the milk and vanilla extract until blended. With mixer at low speed, add the egg mixture to the flour mixture and mix until blended, scraping down the sides of the bowl necessary. (I used a manual whisk to do the mixing. The batter will be very thick at this stage).
  4. Add in the boiling water gradually and mix just until blended and smooth, scraping down the sides of the bowl as necessary. (The mixture will become very thin and watery.)
  5. Pour batter into the prepared pan and bake for 45 to 55 mins until a toothpick inserted into the centre comes out clean. Cool the cake in the pan for 20mins before unmoulding. Let cool completely.
To assemble this 20cm rainbow chocolate cake:
- Place pouring cream (I used one tin of Nestle's pouring cream) and 150g dark chocolate in a saucepan over low heat. Stir until melted and smooth. Set aside for 10mins before frosting the cake.
- Slice two large bananas, lengthwise into halves. Squeeze some lemon juice over.
- Slice chocolate cake into 2 layers. Spread one layer with the chocolate frosting, arrange the sliced bananas (cut side down) on the cake layer to form 2 concentric rings. Cut the bananas as necessary in order to form the two rings.
- Spread the other cake layer with chocolate frosting, flip over and layer it over the banana slices.
- Coat the top and sides of the cake surface with the remaining chocolate frosting. Decorate with colourful cereals and marshmallows as desired.

Recipe adapted from The Cake Book, by Tish Boyle